Hey Doo'ers, how YOU dooooin??? :) (It never gets old!). Adina here, with a lil tutorial for ya...
Have you ever seen Martha Stewart on TV and thought "I can do that"? Only to realize either she makes it look super easy or it turns out to be WAY more difficult in practice than what it looked like on TV?
I find that to sometimes be the case with her scrapping products as well. In particular, the Punch Around the Pages punches have specific measuring directions (who knew?) that should be followed carefully if you want to get a seamless result.
Before you start punching, you should make sure that your edges are horizontally or vertically cut to one of the following measurements in inches: 3.25", 5", 6.75", 8.5", 10.25", or 12". If you cut your paper at any combination of these dimensions, the corner and border punches will match up seamlessly. Obviously for a 12" X 12" piece of cardstock you can just go around the paper with no problems...If you cut a piece of cardstock to 5" X 6.75" you can also create a pretty photo mat to fit a standard 4" X x5.75" photo. Once your paper is cut to the desired size, you can begin punching.
1. First start out with your appropriately sized paper, a corner punch, and the matching straight punch. I used the Framed Dots punches but a little birdy told me that Scrap-A-Doodle Doo has the LOOP edges available so I can't wait to play with THAT one soon! :)
2. Next, punch all four corners of your paper. Don't laugh but I had to read the instructions to learn that... I just kinda thought punch, punch, done. But it's important to first get the corners cut then the rest of the page. Go figure...
3. THEN you can use the straight punch to fill in the blanks. Be careful to align the punches precisely... Another "who knew" moment came when Jami showed me where the dots lined up on the punch to clearly show you how to best line up your punches... I kinda tried eyeballing it before that...

4. Once you've lined up your dots you can go ahead and keep punching across the page, turning the page at ninety degrees when you reach each corner.
5. The same basic rules pertain to photo mats and card sizes. As long as you cut your paper at one of the lengths and widths specified above and as long as you punch the corners first, the rest SHOULD line up...
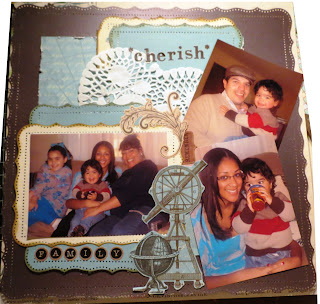
And here's a finished layout using the punches around a 12" X 12" piece of cardstock and several 5" X 6.75" photo mats.


 Monday, May 28, 2012


May 28, 2012 at 9:17 AM
Great tutorial and layout! Need to get crafty!